A smokeshaft that loses water correctly is very easy to disregard. A smokeshaft that doesn't will make itself recognized in the worst means: brownish discolorations dripping throughout a living room ceiling, a stuffy smell after rain, efflorescence growing throughout the masonry, mortar falling apart like chalk. Water is unrelenting. It functions slowly yet continuously, and an overlooked smokeshaft is one of the most usual paths for water to enter a home. If you've managed enough Chimney Repair work, you find out to review the hints early, removed the water's paths, and strengthen the framework so it remains completely dry throughout a week of wintertime freeze-thaw or a summer storm that dumps an inch of rain in twenty minutes.
This guide outlines how a knowledgeable mason methods diagnosis, repair service, and waterproofing. It covers the composition that matters, the difference in between superficial fixes and real remedies, and the sequencing that maintains you from spending two times on the very same problem.
Why smokeshafts leakage, also when whatever looks fine
A smokeshaft is more than visible block. It is a pile built from mortar and masonry units that increase over the roofing system airplane and lose from wind and weather on 4 sides. Every surface is revealed. Traditional are permeable, and they relocate with temperature level swings. The roofing system has its own thermal motion. Where chimney fulfills roofing system, products increase and agreement at various rates, and water seeks gaps at every seam.
Three truths drive most smokeshaft leaks. First, masonry wicks water, and old mortar joints open hairline splits that feed it. Second, any failing in the smokeshaft cap, crown, or flashing provides water a straight course. Third, minor mistakes in past work, frequently unnoticeable from the ground, accumulate. A person smeared mortar over falling short joints without repointing, someone set up a one-piece sheet steel saddle that traps water, someone skipped a drip edge on a crown. A smokeshaft can look strong from the lawn and still be tackling water at the shoulders or with a split crown.
The makeup that matters
The best repair work start with a mental map of parts that either shed water or accumulate it. On a normal masonry chimney you will certainly locate:
- The crown or laundry, the sloped leading surface that must press water far from the flue. Concrete or cast stone prevails. It requires a correct overhang with a drip kerf so water drops complimentary rather than diminishing the face. The flue lining, typically terra-cotta clay floor tiles in older chimneys, stainless steel for numerous relined systems. The liner must be isolated from the crown with a versatile joint or bond breaker so movement does not split the crown. The cap or rain cover, a hood that maintains water and animals out of the flue. A good cap has a large skirt and a strong mesh display. A bad cap, or none in any way, permits direct water entry. Brick and mortar joints, the vertical and straight seams. Soft mortar or hairline fractures let water in, then the freeze-thaw cycle pops takes on blocks, a failure called spalling. Flashing at the roofing system interface. Base flashing is set into mortar joints or reglets on the smokeshaft. Counter-flashing overlaps the base and is tipped to match shingle programs. Negative flashing is the solitary most usual leak resource I locate on solution calls. Shoulders or offsets where chimney size changes. These flat or sloped surfaces capture water and need special interest with steel saddles and membrane. Thimble or violation at the device connection. Even when above-roof locations are best, water can locate its method via fallen short mortar or rusty thimbles in basements or utility rooms.
A comprehensive assessment traces feasible water paths inside out and throughout the roofing system. You wish to spot both direct entrance factors and places where saturation is taking place secretly behind finishes.
A practical assessment procedure that discovers the real problem
I start with a dry-day aesthetic check from the ground, after that from a ladder at the eave, after that on the roofing if it is risk-free and the pitch permits. From inside, I try to find ceiling and wall discolorations near the smokeshaft chase, examine the attic for moist sheathing or rusted nails around the chimney, and search for salt down payments on the stonework in the attic area. If the chimney has a fire place, I beam a light up the flue to look for stray daytime where it shouldn't be and for water tracks or mineral deposits. If it is linked to a heating system or central heating boiler, I check the thimble area for brittle mortar and rust.
On the roofing system, I penetrate mortar joints with a choice. If the choice attacks deeply or mortar crumbles, repointing is not optional. I touch blocks with a hammer handle. A hollow sound occasionally indicates delamination behind the face. I check the crown for hairline splits and for bond to the flue liner. A crown that is limited to the tile is prone to fracturing as the liner increases when hot. I check out the flashing carefully, running a gloved hand along the counter-flashing edge to really feel for voids or failing sealer. Silicone chunks are a negative sign, normally a plaster over a flashing mistake.
If I need even more assurance, I utilize a yard tube in a regulated means. I begin reduced, wetting the tiles below the chimney without striking the chimney itself. If no leak appears inside after 15 to 20 mins, I move up, moistening the step blinking area, then the sides, after that the crown. This organized technique isolates the leak resource. A great deal of cash is wasted on sealants when the real issue is blinking, or on brand-new flashing when the problem is a crown that sends out water down the sides. Perseverance here saves the job.
Priorities: what to take care of initial and why
Not every problem demands a full restore. On the other hand, patching a broken crown without addressing collapsing joints below usually purchases a period at finest. I arrange work into four classes.
Stop energetic leakages at noticeable factors. A missing cap, gapped flashing, or a split in a crown that opens throughout the day and shuts at night will allow direct water entry. Those get leading priority. I have seen ceiling stains expand by a foot overnight when a storm hits a smokeshaft with no cap.
Arrest recurring degeneration. Soft mortar and spalling blocks tell you the chimney is consuming water. Repointing and often careful brick replacement quit the cycle. If the freeze-thaw period is coming, timing issues. There is a big distinction in performance between a chimney repointed in September and one entrusted to soak all winter.
Make long-term renovations that spend for themselves. A correct actors crown with a drip edge, two-part blinking, and a breathable water repellent expand the service life of the whole pile. These are not cosmetics. They are practical upgrades that transform just how water behaves at the surface and at seams.
Address internal security while you are there. If the flue is cracked or the liner is missing, water is only one of your issues. Combustion safety overtakes cosmetics. When I see efflorescence on a heater flue, I check draft and CO levels. A saturated smokeshaft can cool flue gases and decrease draft, which matters for older appliances.
The craft of repointing: more than new mortar
Repointing, done right, implies getting rid of worn-out mortar to a sound deepness, cleaning up joints, and packing in new mortar that matches the initial in compressive strength and shade. Frequently, I locate a smear layer, where soft mortar is simply covered with a slim brand-new layer. That layer debonds promptly and traps moisture.
Depth matters. Generally, I removed to a minimum of two times the joint size, typically 5/8 inch or even more on old smokeshafts. For a historic brick, even deeper if the joint is fully decayed. I avoid power grinding on soft brick because it chews right into the arrises, the crisp edges that offer a wall character and toughness. Hand raking with joint rakes and chisels is slower but saves brick. If the task allows light grinding, I make use of vacuum cleaner shadows and maintain discs off block faces.
The mortar itself matters. Many older chimneys were developed with lime-rich mortar, softer and more vapor permeable than contemporary Portland-heavy blends. Making use of a hard mortar on soft block can trigger new spalling as the brick comes to be the sacrificial element during freeze-thaw cycles. For pre-1920s block in my location, I usually utilize an NHL 3.5 or lime-cement mix created to reach compressive toughness in the 700 to 1200 psi array, with excellent breathability. For more recent block, a Type N frequently fits. I simulated up an example and confirm shade and appearance. Too white and the joints scream. Also grey and it looks like a patch.
Timing and treating are not flexible. I wet the joints prior to packing, particularly in summer season. I tool joints when they have readied to finger-firm. After that I mist them to decrease the remedy for a day or more. Quick drying out shrinks and fractures mortar. On warm roofs, I will certainly gear color cloth. That extra hour keeps the job sound.
Brick substitute and spalling control
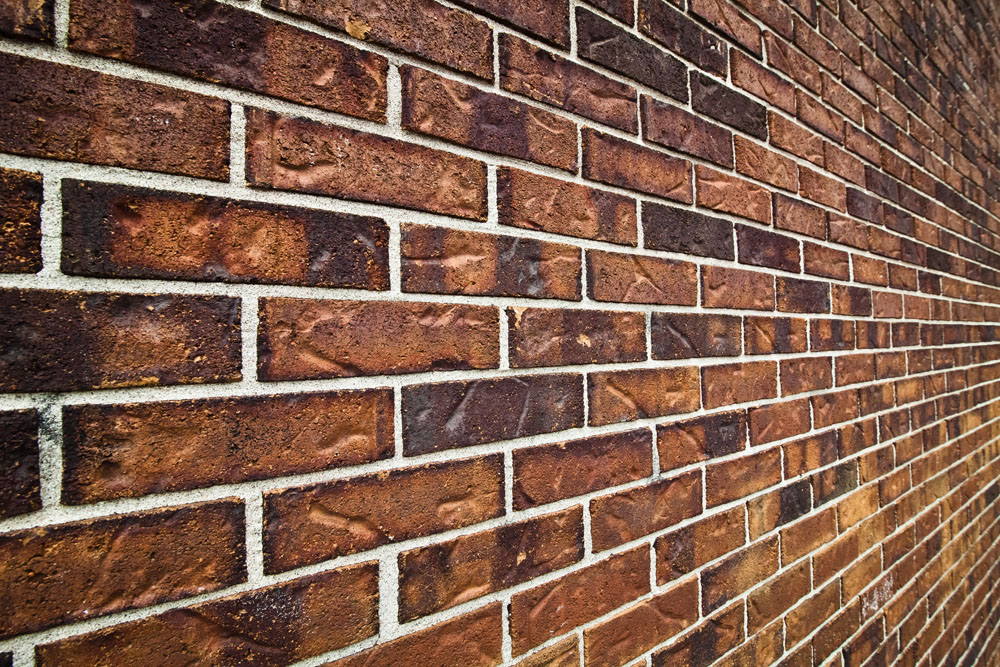
When brick faces pop off, water has currently been relocating in and out of the wall surface. You can repoint every joint and still have trouble if the worst blocks are left. I eliminate spalled units by reducing the head and bed joints meticulously, then spying with slim bars, not brute force. Replacement brick need to match dimension and absorption price, not simply color. Mixing a dense, low-absorption unit right into a field of soft, high-absorption brick can change where wetness collects. In climates with big temperature level swings, that inequality reduces life. If you can not resource specific Chimney Repair Contractor in Wilsonville suits, choose a compatible block and change mortar to balance the system. Much better a mild shade variation that does than an excellent shade match that fails.
On shoulders or large chimneys where water rests, I consider a lead, copper, or stainless saddle under new block if restore is on the table. A saddle is not constantly noticeable when finished with treatment, however it transforms the formula by losing water prior to it can saturate in.
Crowns: the most ignored component
If I might take care of only one above-roof element on regular chimneys built in the last half a century, it would be the crown. Several crowns are nothing greater than a skim of mortar that bonds to the flue floor tile and to the top program of brick. That setting up splits as soon as seasons change. Water then runs through those cracks into the core.
A proper crown is at least 2 inches thick at the thinnest point, sloped to drain pipes, and enhanced. It ought to overhang the brick by 1 to 2 inches with a drip kerf cut into the underside of the edge. That kerf interrupts surface tension so water drops clear rather than curling back and tarnishing the face. The crown has to be separated from the flue lining with a bond breaker or expansion joint. I wrap the liner with foam backer rod and polyethylene before the put, then tool an adaptable sealant joint after the crown cures. This sets you back a little bit much more in labor and material. It is also the distinction between a crown that lasts two years and one that lasts two decades.
For existing crowns with small cracks, an elastomeric crown finish can purchase time. I clean the surface, chase after cracks, prime if the item requires it, after that use in two coats at the manufacturer's insurance coverage rate. These finishes bridge hairline crevices and shed water. They are not a remedy for architectural failing. If the crown is flaked, falling apart, or adhered to the flue with huge spaces, I remove and recast.
Flashing: where most leakages begin
The roof-chimney joint must deal with motion. An excellent flashing system uses two parts. Base flashing, stepped with shingle programs, runs under tiles and up the chimney. Counter-flashing is allow into a reglet or a mortar joint and laps over the base. Water that obtains under the tiles moves onto the base flashing and out, while the counter-flashing covers the upright leg and moves independently.
I do not rely on surface area sealants as the main protection. Sealers stop working. Metal, effectively formed and incorporated with roofing, is the resilient service. For shingles, I prefer step flashing pieces, commonly 5 by 7 inches, lapped with each tile training course. Continual L-flashing is much faster however extra at risk to bending and water invasion. For steel choice, galvanized steel prevails and appropriate, though in coastal or acidic environments copper or stainless earns its maintain. When dealing with copper, I solder joints for durability, not simply bend and hope.
At the uphill side of a vast chimney, a cricket or saddle is crucial. Water and particles pile up otherwise, and leakages are inevitable. A cricket framed and roofed with the exact same material as the main roof, with flashing and counter-flashing incorporated, breaks the flow and sends it around the sides.
When retrofitting counter-flashing, I cut a kerf into a mortar joint 1 inch deep, place a return on the metal, and seal with a top quality urethane or silicone rated for exterior masonry. I prevent cutting the block face. A straight reglet cut looks tidy, but it removes block product and telegraphs the fixing throughout the altitude. Utilizing joints appreciates the structure and protects future repointing options.
Breathable waterproofing: when, what, and how
Masonry sealants have a mixed credibility, primarily due to the fact that the incorrect item put on the wrong wall can catch moisture and accelerate damage. The factor of a sealant on masonry is to drive away liquid water at the surface area while permitting water vapor to pass. Solvent-based silane or siloxane treatments are the standard for this. They permeate, react with the substrate, and do not create a surface area film. Acrylics that develop a shiny skin must be avoided on smokeshaft encounters. Those films peel and trap moisture.
Before securing, the masonry must be completely dry and noise. Securing over moist joints locks wetness in. I arrange sealers after repointing and after a couple of days of dry weather, with temperature levels in the supplier's variety, commonly 40 to 90 degrees Fahrenheit. I mask the roof surface, use by low-pressure sprayer, and back-brush to reach every crevice. Protection rates vary by porosity. A tight, dense brick might take 100 to 150 square feet per gallon. A soft, absorbing block might drink it at 50 square feet per gallon. 2 wet-on-wet passes provide a more uniform result. If water grains like on a waxed automobile when you wash after drying, you have protection. If it darkens erratically, you missed places or used onto residual moisture.
Sealers are not magic. They minimize absorption drastically, frequently by 80 percent or more, however they do not deal with broken crowns, spaces at the flashing, or structural cracks. Made use of as the last step after repair services, they slow weathering and keep the wall surface drier, which maintains freeze-thaw damage at bay.
Managing wetness from the within out
Sometimes the smokeshaft is taking water not from the sky but from exhaust. High-efficiency home appliances discard cooler flue gases that condense inside old stonework flues. That condensate is acidic and eats mortar. It also maintains the flue damp. If a gas furnace or water heater vents into a large masonry flue, think about a correctly sized stainless steel lining. By narrowing the flue to match the device result, you maintain flue gases cozy, decrease condensation, and shield the stonework. In moist cellars, I also check out dehumidification. If the smokeshaft base sits in damp air all summer season, the pile can take in moisture like a sponge.
Wood-burning fire places and cooktops add their very own spin. A tight, large cap keeps rainfall out however needs to enable smoke to compose openly. I like caps with vast, strong tops and vertical skirts that prolong at the very least a few inches beyond the flue, placed with legs that secure to the crown or flue floor tile rather than with screws into brick encounters. For multiple flues, a customized pan-style cap can cover everything. It is a lot more costly up front, yet it additionally protects the crown and cuts down on laundry lines.
Edge situations and tricky setups
Short smokeshafts near high roofing airplanes tend to back-draft, which can carry wet snow and wind-driven rain into the flue. Expanding the smokeshaft or making use of a specialized cap aids, yet view local codes for height over ridge and range from roofing system. On low-slope roofing systems with membrane systems, the detailing changes. I coordinate with the roofer to make sure the membrane shows up the smokeshaft and is mechanically secured, then counter-flashed in metal. Tar shovelled on the side of a smokeshaft where a membrane layer must be is a time bomb.
Historic smokeshafts bring restraints. The brick may be softer, the mortar lime-rich, and the account safeguarded. You can still include a correct crown and discreet flashing, however you need to pick materials meticulously. I have actually matched historic corbelling by casting a crown that steps back in two programs and cutting a drip kerf below each step, a compromise that keeps the look and adds function.
Prefab chimneys with chase covers are a various animal. A rusted chase cover sends water directly into the framed chase. Stainless-steel replacements with cross breaks to drop water, bonded edges, and a hemmed edge that sits on a constant assistance are the solution. The exact same reasoning uses. Keep water off, offer it a clear course away, and stay clear of seams that open up with movement.
Cost, timing, and the order of work
Homeowners usually ask for the least expensive choice that will certainly quit a leakage. The truthful answer is that the cheapest reliable solution depends entirely on what is failing. A ball park, with wide ranges:
- Repointing over the roofline on a modest smokeshaft, consisting of arrangement, runs in the reduced four figures in lots of markets, more if gain access to is challenging or if block replacement is heavy. Removing and casting a new crown might include a comparable amount, depending upon dimension and reinforcement. New step and counter-flashing, consisting of a cricket if required, frequently lands in the mid four numbers when roofing combination is done right. A breathable water repellent for a typical above-roof area is modest in cost compared to the labor of the other work, usually a fraction of the total.
Sequence issues. I schedule repair work dry to damp. Repointing and brick substitute initially, then crown work, then flashing combination, then sealer after everything cures. If rainfall is in the forecast, a short-term cover over the crown location or a tarpaulin tent over the chimney safeguards fresh work. Rushing a sealant onto wet stonework wastes product and lowers effectiveness.
DIY versus working with out
Plenty of homeowners can manage fundamental upkeep, like installing a cap, cleaning on a crown covering on a sound crown, or using a quality siloxane sealer. The line where I strongly advise a pro is anything involving reducing into masonry, reconstructing crowns, or incorporating blinking with roof covering. Those jobs call for judgment, and blunders are expensive. Grinding too deep right into a joint on soft block, pouring a crown that bonds to the flue, or embedding blinking wrong under shingles condemns the next individual to reverse and renovate. If you work with, request photos of the operate at each step. An excellent professional documents the joints reduced and loaded, the crown types and reinforcement, the counter-flashing kerfs, and the flashing integration with shingles.
Maintenance that keeps water out year after year
Chimneys stay in the weather full-time. A little focus every year or more extends the life of huge repair work. After winter season, I do a fast roof-level evaluation. I examine the cap screws and mesh, clear any kind of nests, search for brand-new hairline splits in the crown, and check the flashing line for lifted sides. From inside, I examine the attic around the chimney after a heavy rain. Ten minutes invested after that saves a weekend break of emergency pails later on. If the chimney is sealed with a breathable repellent, I expect 5 to ten years of solution depending upon direct exposure. When water stops beading, I reapply after a completely dry spell.
Fireplace individuals should bear in mind that ashes hold dampness. A wet ash bed keeps the firebox moist, which wicks right into the chimney. Shovel out on a regular basis and maintain the damper useful to control air flow and decrease summer moisture migration.
A quick situation research study: the ceiling tarnish that maintained coming back
A property owner called after two efforts by others to quit a leak that stained a room ceiling every spring. The crown had actually been covered, and a charitable grain of silicone left the blinking. On inspection, the crown finishing looked penalty. The step blinking also looked undamaged at a glimpse. The attic informed the story. Discolorations tracked from the uphill side of the smokeshaft where roof shingles debris loaded behind a large stack. There was no cricket. Under the roof shingles, the base flashing was continuous, not stepped. Water was backing up under heavy rainfall, crossing the continuous L, and discovering nail holes.
We reframed a small cricket, mounted action flashing integrated with each shingle program, reduced in new counter-flashing set in mortar joints, and left the crown finish alone. After 2 tornados, the attic stayed completely dry. The job expense more than another tube of silicone, yet it fixed the right problem. This is regular. The leak course is hardly ever the location that looks wet. It is the location that collects water and conceals the path.
The bottom line: build a system that sheds water and breathes
Chimney Repair service is not a solitary job. It is a sequence. Start by understanding how water goes into, then block those entries with durable components and suitable products. Keep the crown independent and strong. Blink so the roofing and smokeshaft can move without tearing joints. Usage mortar that matches the stonework, not whatever is in a bag for sale. Apply a breathable sealant as the last layer of armor, not as a prop. Give the flue a correct cap and provide the wall surfaces an occasional appearance from a ladder or the attic room hatch.
A dry smokeshaft is peaceful. It does not tarnish or scent. It does not flake block in wintertime. It just vents securely and stands right with storms. If you put the assemble with care, you just have to think about it every few years, and when you do, it is a quick check, not a rescue mission.
Business Name: Ramos Masonry Construction Company Address: 1400 E Seventh St, Newberg, Oregon Website: https://ramosmasonry.com/ Email: [email protected] Phone: +15038575988